Copyright 2022 IEW Solutions an ifelseWare Conpany
Global Properties
NOTE: Keep in mind that any changes made are saved in real time.
New Asset Defaults
Pre-Buffer New Assets: When enabled, all assets added to a playlist will automatically open and load into memory at that time.
WARNING: Use caution when this option is enabled. As assets are being added to the system will monitor the total amount of available RAM and if that level rises above 90% you will receive warnings suggesting that you un-buffer older assets to relive stress on the computer.
Set Repeat On New Assets: When enabled any motion based asset added to the playlist will already have its repeat flag automatically set.
By default, when an asset is playing as relative or independent they are not affected by the primary transport controls. This means that even if a primary asset (one that has control over the timeline) comes to an end or is stopped manually, any relative playing assets will not be stopped and will continue playing until they end naturally or are manually stopped.
When this option is enabled, any assets playing as relative at the time will be instructed to stop along with the underlying primary asset.
NOTE: When the transport 'CLEAR' button is pressed all asset including relatives will be stopped no mater if this option is set or not.
When enabled each individual control will produce a helpful popup describing its purpose. Due to it sometimes interfering with mouse clicks, it is recommended that this feature be disabled once you feel comfortable with all aspects of the program.
One of the program’s key features is its ability to easily connect to another workstation and use it as a backup that will mimic the primary. If you wish to setup for this scenario select the appropriate role for each of the two workstations
Start Delay:
If workstation is designated to be the backup, you can choose to delay the start of play in sceconds. This can be handy when you prefer to stager play times between a primary and its backup. The default is 0.
NOTE: As long as the link between the two are enabled all transport commands and edits performed on the primary will instantly occur on the backup as well. Also, if an asset file is added to the primary playlist but does not exist on the backup, a copy of the file will automatically be transferred to the backup for you.
Establishing a default asset folder is mandatory. To make transferring event files to other storage mediums or computers easier, all assets will be automatically copied into this folder even when resourcing files from other drives and/or folders.
NOTE: Files are copied leaving the original file intact at its source. To prevent excessive use of available drive space on your system it is recommended that you manually add needed event assets directly to the event folder and prevent the system from having to create wasteful copies.
This feature provides a simple way to remotely trigger other Legion II workstations to work in unison with a single primary. This can be helpful when the presentation requires more outputs than are available on the primary computer or perhaps when multi-assets of varying aspect ratios are spanning over several screens. This can even provide reasonable degree of playback synchronization as well.
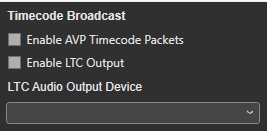
When checked all transport functions either from manual user input or by automated functions, will be broadcast via Ethernet UDP packets which then can be received by any other Legion II workstation that is listening for them.
Recive Transport Broadcast Commands:
When checked all broadcasted transport commands will be received and performed locally.
Enable HyperDeck Emulation:
When enabled, Legion can be control directly from a Blackmagic ATEM switcher.
To synchronize cues on other external devices using an assets current position, you can employ Linear Time Code (LTC), Midi-TC or Art-Net-TC to stream that signal.
NOTE: Anytime a new selection is made it will automatically shut down any TC streams currently running. Once you are done selecting framerate and/or output device simply click on the Activate button begin outputting again.
Framerate:
Both Midi and Art-Net can only accept the following framerates: 24, 25, 29.97 & 30 frames per second. You can statically select any one of those, or you can use ‘Auto’. When auto is selected the streams, framerate will dynamically change to match the current primary asset own rendered framerate. NOTE: if the framerate of the asset does not match the supported rates, it will automatically choose the closet match. i.e. 23.976 will become 24fps ND, 59.94 will become 29.97 DF and 60 will become 30 ND
Art-Net Port:
When Art-Net is the selected format, The port adjust appears. Use to set the port number the Art-Net stream is sent on. Default Art-Net address is 6454.
LTC Audio Device / Midi Device Port:
This drop down lists all appropriate devices currently available to use.
Activate Button:
Use this button to activate the output stream.
NOTE: To maintain a stable LTC output it is recommended that you use the computer’s built-in audio speaker output. Internal tests with some USB to analog adapters have shown they provide to weak a signal.
WARNING: The device chosen, LTC or Midi, will be made exclusive and can not shared by any other process on the same computer.
Every new asset added needs to know what audio output to use. In most cases you will probably use the same output. This where you can choose which will be the go-to default.
Default Program Audio Device:
If the app is newly installed or any previous selection has become unavailable, the system will revert to the standard audio output devices that has been set in Windows. However, clicking will reveal the list of all currently enabled audio playback devices found on the local computer. If desired, select the one that you wish to be used instead.
NOTE: After an asset has been added to the playlist you can override this default assignment and select a different output for that asset independently without affecting others.
Enable the use of ASIO outputs:
Check this to enable globally, the use of ASIO as an optional audio output.
If you are either using assets with multi-track audio embedded, (greater than two), or simply wish to use a single multi-output device, such as a Tascam or Presonus to handle all audio outputs for the entire playlist, enable this option and the system will instead employ an ASIO (Audio Stream Input/Output) renderer to compile the output stream.
Installed with Legion is the MBSE Multichannel ASIO Renderer which is necessary to compile multiple audio streams into a single ASIO data stream. However, this is a third-party driver and requires the purchase of its own license.See: How to install or transfer the MBSE asio renderer license
Use ASIO Output:
When enable the device list will now only contain a list of ASIO output device drivers currently installed on your system.
NOTE: If instead of using an ASIO compatible device like a Tascam or PreSonus, you could take advantage of Blackmagic’s Decklink cards ability to have multiple audio tracks embedded into a single SDI output and de-embed them down stream. Decklink drivers include a simple WDM speaker driver which appears in the same list as the other standard stereo outputs. If choosing this approach, you would leave the ‘Enable the use of ASIO outputs’ option unchecked. Also, unlike using the ASIO render, this method does not provide any custom channel routing, instead assignments will just be one to one.
To aid in backward compatibility, some older computers might not be able to work with the default Enhanced Video Renderer. If you find that renderer refuses to work, you can choose the older Video Mixing Renderer from this list which should work.
NOTE: If any change to the default audio settings has occurred, you will be prompted to choose whether you want to automaticly apply the change to all current playlist assets. Doing this will initiate a reloading of the playlist.