Copyright 2022 IEW Solutions an ifelseWare Conpany
Mask Designer Tools
Launching the designer utility:
To create one for an asset, once an asset is taken to preview you can launch the designer by going to Asset Properties / Treatments then click on the 'Editor' button.
For global masks you can launch its desigener by going to the main Settings menu and select PGM Mask Designer.
Notice next to each is list of all currently created masks. In either case selecting from the list will immediately change the current mask file respectfully.
NOTE: Keep in mind the global mask designer appears directly on the PGM output space. This means if signal flow is only going downstream to projection, and you do not have a live monitor backstage with you will need to position yourself out in front of the projection screen.
Designer Canvas:
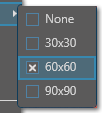
Once activated a grid will appear on the either program output for global masks or within the preview monitor for asset masks.You can choose between three different grid sizes or disable the grid altogether.
If an existing mask is currently assigned to PGM, the designer will automatically load the editable version of it.
Designer Menu:
Use Existing Mask
If If you wish to re-edit an already created mask you can select it from this list. Be aware that this only effects the designer canvas. If program already has a mask in place this will not change at first. However, when exiting the designer, you will be asked then if you want it to replace current mask.
One option is to make a mask utilizing a PNG image file. The mask is generated by creating an outline around all its opaque areas. The level of transparency we inevitably see in the final content after the mask is applied is determined by any and all variations in opacity levels within the image, we use to make the mask. This means the only file type we can use are ones that support transparency such as PNG or GIF.
Insert Image File:
Clicking reveals a sub menu
Add New opens a file browser. When one is selected it will first be copied into the Masks sub folder, (Folder is automatically created and placed under the event show folder.) then the image will be placed onto the design canvas.
The reminder lists any available image files currently saved in the Masks folder.
NOTE: You are encouraged to manually place all image files you will need ahead of time into the Masks folder. This way it saves you from having to import them one at a time.
Stretch:
Use to select how an Image should be stretched to fill the destination rectangle.
None: The content preserves its original size.
Fill: The content is resized to fill the destination dimensions. The aspect ratio is not preserved.
Uniform: The content is resized to fit in the destination dimensions while it preserves its native aspect ratio.
Uniform Fill: The content is resized to fill the destination dimensions while it preserves its native aspect ratio. If the aspect ratio of the destination rectangle differs from the source, the source content is clipped to fit in the destination dimensions.
Fit to Screen:
Use to force the containing rectangle to fill the entire space.
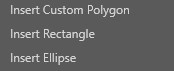
This is the designers most powerful tools. When selected, it starts with a simple rectangle with pick points at its four corners.
To manipulate, click down on a point and drag it to where you need it. You can add additional adjustment points by simply left clicking anywhere along the line between points. There is no limit to how many points you can add.
Right click on any point to reveal a popup menu with two options either to remove the and the other allows us to add a smooth radius at the corner point.
Insert Rectangle:
Use when only a simple four-sided rectangle is all that is needed. Surrounding the frame are 9 pick points you can click and drag to resize it. Click and drag from anywhere inside the shape to adjust its position.
Insert Elipse:
Like the rectangle, if you only require a simple circle or oval then chose this. Manipulate it the same as you would the rectangle.
This option toggles between whether transparency effect of the mask is inside our shape or the remaining area outside of it.
NOTE: This feature is only available when using shapes, it is not available when using an image file. In addition, when enabled, edge softness will be disabled, and any adjustments will be ignored.
Use to set to the fill opacity of the shape or image while designing. Makes easier to not completely obscure the area underneath that is being traced.
This setting doesn’t affect the fill area of the finished mask. If the mask is a basic geometric shape it will always be filled with a solid white.
NOTE: If the mask is created using an Image file, along with the fully transparent areas creating a complete cut, any other areas within the image that are semi-transparent will cause masked asset to be semi-transparent in those area as well.
To help visually see the mask at work click Test Mask. This will temporarily hide the designer grid as well as all point elements and apply the worked mask to the asset or PGM space.'
Use Edit Mask to bring back the designer and resume work.
Save: Save worked mask as a raw file. All raw mask files are kept in a sub folder named Raw under the event’s Mask folder.
Export Current Mask: This function transforms the raw mask into its own PNG image file. The file can then be imported into other switching devices and/or software that supports using opacity masks. Saved file is stored in the event’s Masks folder.
Done: Closes designer. If current work has not already been saved you will be prompted to save it at time.