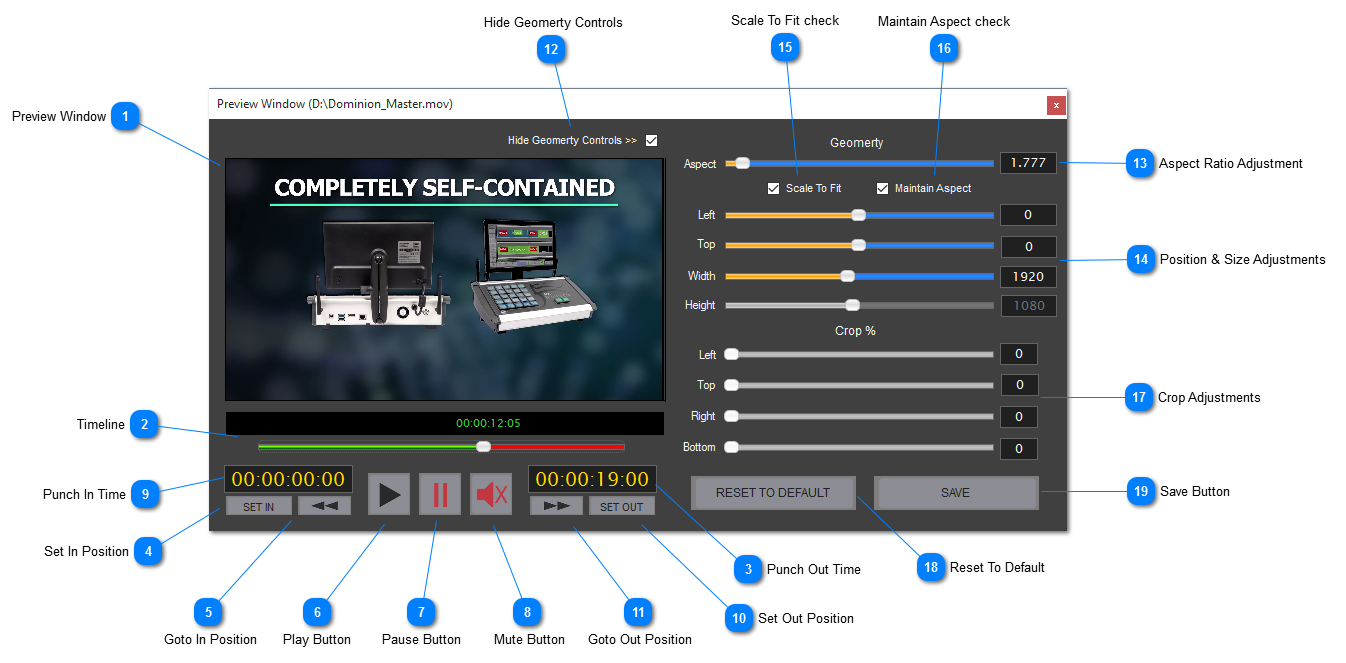
The preview control allows you independent access to any video clip within the current playlist. You can have as many these preview controls open as you like. Each one is free to be positioned anywhere within AVP’s desktop. From this control, you can preview an entire clip without affecting the program play of other clips in the playlist. You can also edit certain properties of the selected clip, but most importantly this is where any custom geometry adjustments for a clip are made.
This timeline is a simplified version of the playlist timeline and is operated in much the same way. It only gives you a basic ability to position the preview’s play head, at the same time it provides a visual representation of that position.
This editable text box displays the clips current punch in time point. You are free to type in a new point directly.
NOTE: Any changes to either the punch in or out time is immediately saved in the playlist. This means even if the clip being previewed is also currently playing in program, you can affect a change to its behave instantly.
Another method for setting the punch in point, is to use the timeline to come to the desired position and then click this button. The current 'In' time will now be displayed and saved.
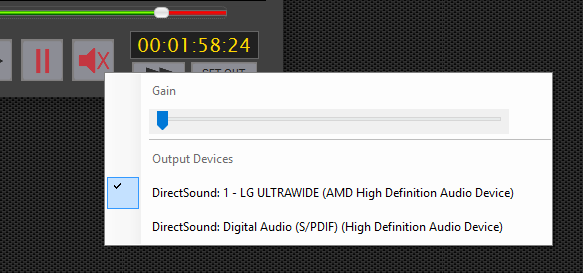
Left click this button to un-mute or mute the preview control’s audio output.
Right clicking on the will display a popup menu from where you can select which available audio output will be used. This makes it possible to have a separate private output for previewing.
There is also a trackbar that enables adjustment the audio output gain.
This editable text box displays the clips current punch out time point. You are free to type in a new point directly.
NOTE: Any changes to either the punch in or out time is immediately saved in the playlist. This means even if the clip being previewed is also currently playing in program, you can affect a change to its behave instantly.
Another method for setting the punch out point, is to use the timeline to come to the desired position and then click this button. The current 'Out' time will now be displayed and saved.
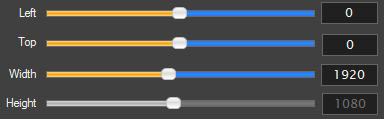
Each of these controls will allow you to customize a clip’s visual geometry. All changes will be visible inside the Preview Window. If the current preview clip is the same as the one currently in the playlist’s program output, these changes will also be visible in that output screen.
NOTE: For each of the following controls, you can also type the value in directly its adjoining text box. You must click the Enter key on your keyboard for the typed value to be taken.
Hide Geomerty Controls
When checked the preview control window will expand revealing the geometry controls. Uncheck the box to hide these controls.
NOTE: if the ‘Maintain Aspect’ is checked the Height adjustment will be disable but it will continue to show the current height as it relates to the adjusted width divided by the aspect ratio.
When this is checked you will be locked out from performing any aspect, position or size adjustments. Instead AV-Playback will automatically scale the clip’s output to fit within the output resolution. It will also ensure the clip’s native aspect is maintained, even if ‘Maintain Aspect’ is unchecked.
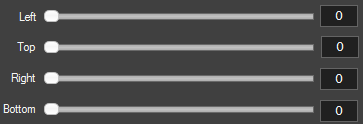
Use these to adjust any required cropping panels needed to conceal portions of the video output. Values are in the percentage of the total screen dimension.